Adventures in Woodworking Part 3
Feb 14, 2017 | Samantha Dyck, Operations Manager, Hard Hat Hunter
After how much I enjoyed my first carpentry class at Canadore College, I was excited to choose what to construct for my first solo project.
After scouring Pinterest for ideas, I finally decided that I would create a baby gate. My current gate is a plastic pressure mounted model. Lately, my son has decided to body check the system, and climb over the destructed gate, defeating its purpose entirely. By building a wooden hinged gate, I would get practical building experience while constructing something that suits my needs. Score!
I found partial plans of what I was hoping to accomplish, and forwarded them to our Class Instructor, Adam. I asked him for advice on what lumber and hardware I would require to complete the project.
This week’s class began by finishing last week’s project: the tealight holder. Using a bore drill bit, we created five 1 ½” holes to house the candles. After drilling it, I quickly went over the piece with a sanding block to smooth its edges, finishing it up. Here are the fruits of my labour:
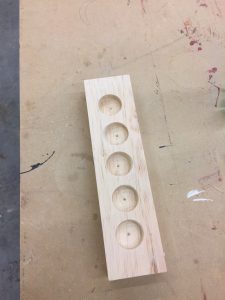
Completed tealight holder
You can see there was some hesitation on one of the holes. As a result, they aren’t necessarily straight. Even though it’s not perfect, I’m fairly pleased with my first creation.
Let's Build a Gate
Upon completion of the tealight holder, we were advised that we could begin our individual projects. Adam walked me through the project, helping me modify the plans to suit my stairway.
Once the plans were completed, I got to building. I gathered the supplies that Adam had identified:
- 3- 1”x 5 ½” x 8’
- 5- 1”x 3 ½” x 8’
- 1 box of 1 ½” screws
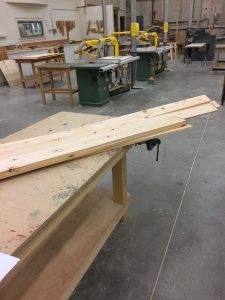
Some of my supplies
To build my baby gate, I needed:
- 9 slats @ 1”x 3 ½” x 30”
- 2 styles @ 1” x 5 ½” x 19”
- 2 styles @ 1” x 5 ½” x 31 ¾”
- 2 cross pieces- measurements to be determined
I started by taking my 3 ½” wide lumber and cutting it down to 30” in length using a chop saw.
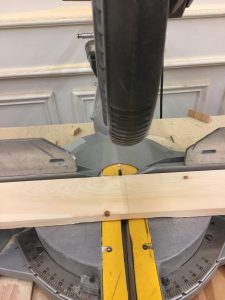
Chop Saw
Next, I used the same tool and the 5 ½” lumber to cut the 4 styles (2 @ 19” long, 2 @ 31 ¾” long).
After all my components (except the cross pieces) were cut, I could start building. With Adam’s help, I attached the scrap lumber to the work bench, using 3” long screws and a drill, to create a square edge (within which I could build my gate). I used a carpenter’s square to get a 90° angle.
From there, I lined up the slats with the styles. Following a pattern that Adam demonstrated, I attached all the pieces using the 1 ½” screws.
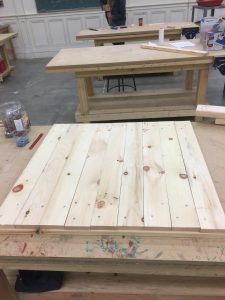
Slats all in place
I’m not certain if it’s because my scrap lumber wasn’t as square as it should have been, or because I’m still learning, but when I finished attaching all the slats, my edges weren’t square. I adjusted two slats, which helped, but required further assistance. Adam quickly used the table saw to square off the back edge of the gate.
Looking Ahead
I’ll complete my gate next class. Here’s what I have left to do:
- Determine the required angle of my cross pieces
- Use the chop saw to cut the cross pieces to the appropriate angle
- Determine size required for rail piece
- Use the chop saw to cut the rail piece
- Attach the cross pieces
- Attach the rail piece
- Attach the hinge
It was gratifying to look back at the end of the class and have tangible proof of what I have accomplished. I’m looking forward to getting my gate finished up, and starting on my next project.
Can’t wait to share it with you!
Article by: Samantha Dyck, Operations Manager, Hard Hat Hunter
Canadore College announced a partnership with Hard Hat Hunter, a unique social media channel geared towards the trades and construction industries in November 2016.