Adventures in Woodworking Part 4
Mar 14, 2017 | Samantha Dyck, Operations Manager, Hard Hat Hunter
This week’s carpentry class began with a quick lesson on sharpening chisels. To begin, we used a ninja-star-shaped bevel gauge to determine the angle of the primary bevel of the chisel. From there, we appropriately adjusted the angle on the power sharpening system tool.
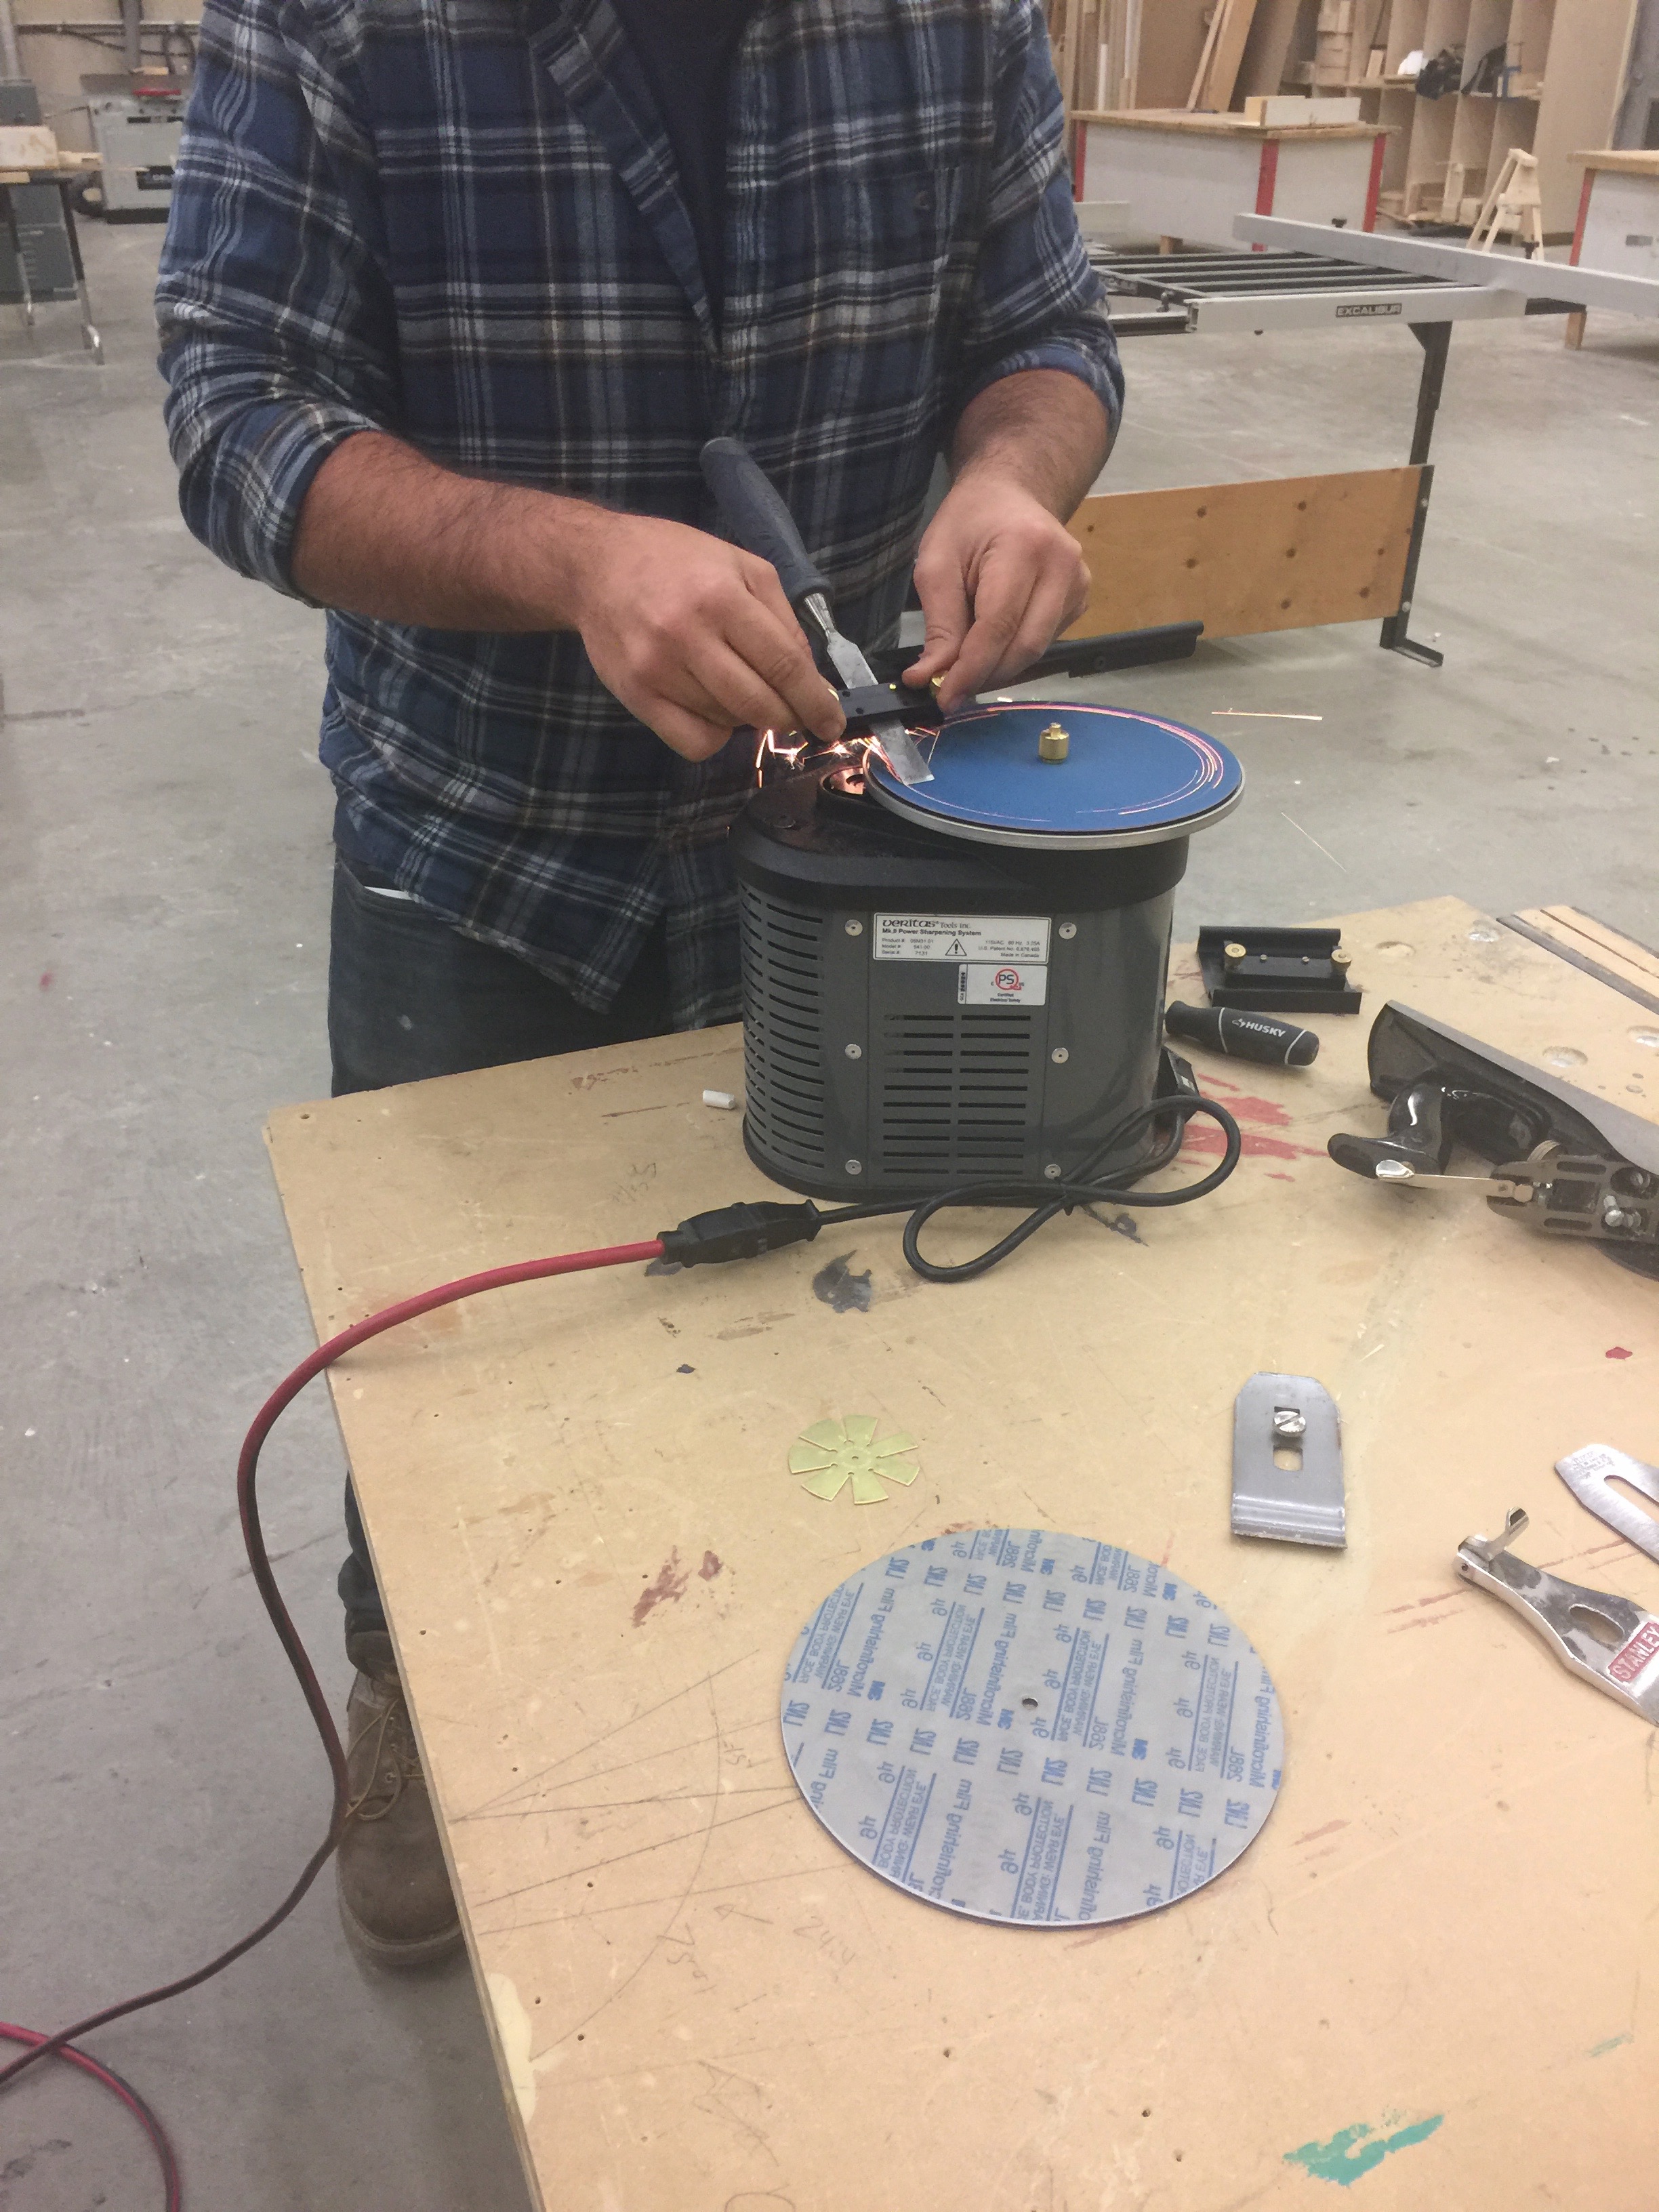
A 80-grit sanding disc was used first, followed by a 150 grit to hone the primary bevel. Next, a 320-grit was used for lapping the face of the chisel. Finally, we used a 1200 grit to sharpen the micro bevel. The whole process, including changing over the sanding discs, only took a few minutes.
A few students decided to put the newly sharpened chisels to work by practicing dovetail joints. I, however, decided to get back to work on my gate.
Back At It
I was eager to complete my gate and replace my flimsy plastic pressure mounted model with my chef d’oeuvre. Last week, I identified the following steps required to complete my gate:
- Cut and attach the cross pieces
- Cut and attach the rail piece
- Attach the hinge and latch
When I grabbed my gate from the woodshop’s storage, I noticed that my rails had shifted, creating a space between them, and making the semi-finished product less than square. I quickly used a drill to remove and then reattach them in a more appropriate place.
Next, using a speed square and Adam’s assistance, I marked the first cross piece where it needed to be cut on both ends.
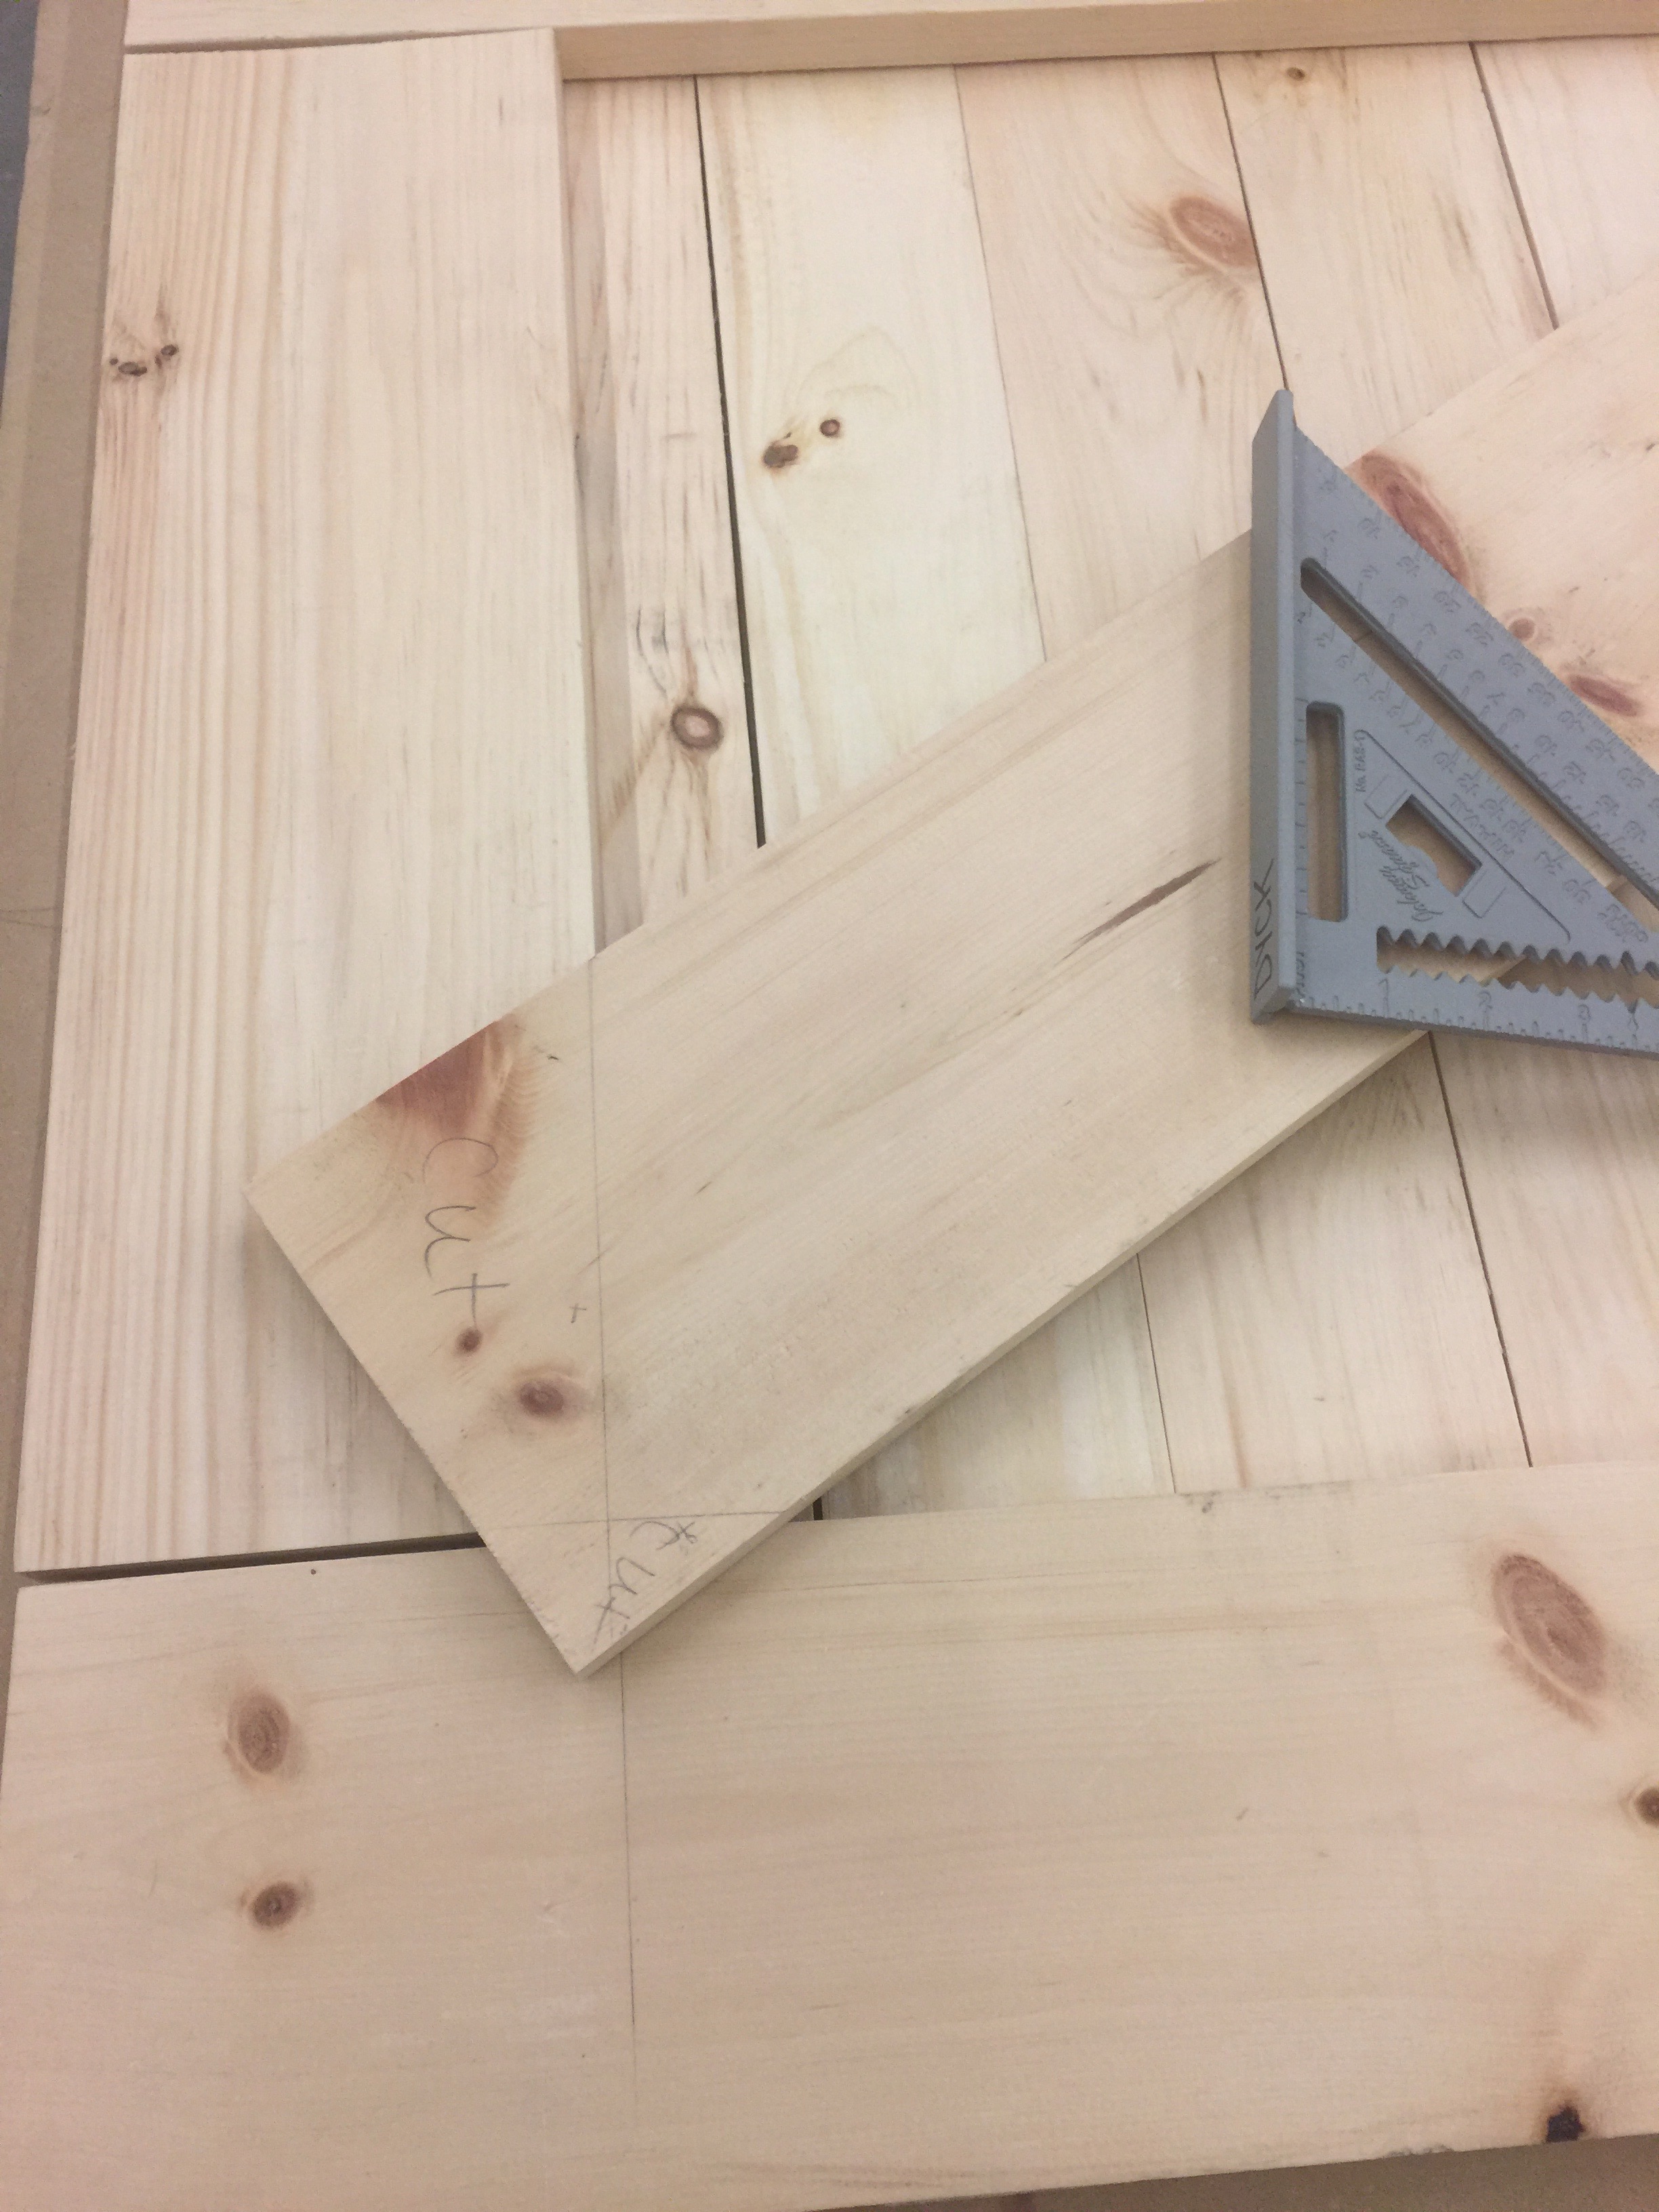
I used the chop saw to make the cuts, and was pleasantly surprised when it fit perfectly.
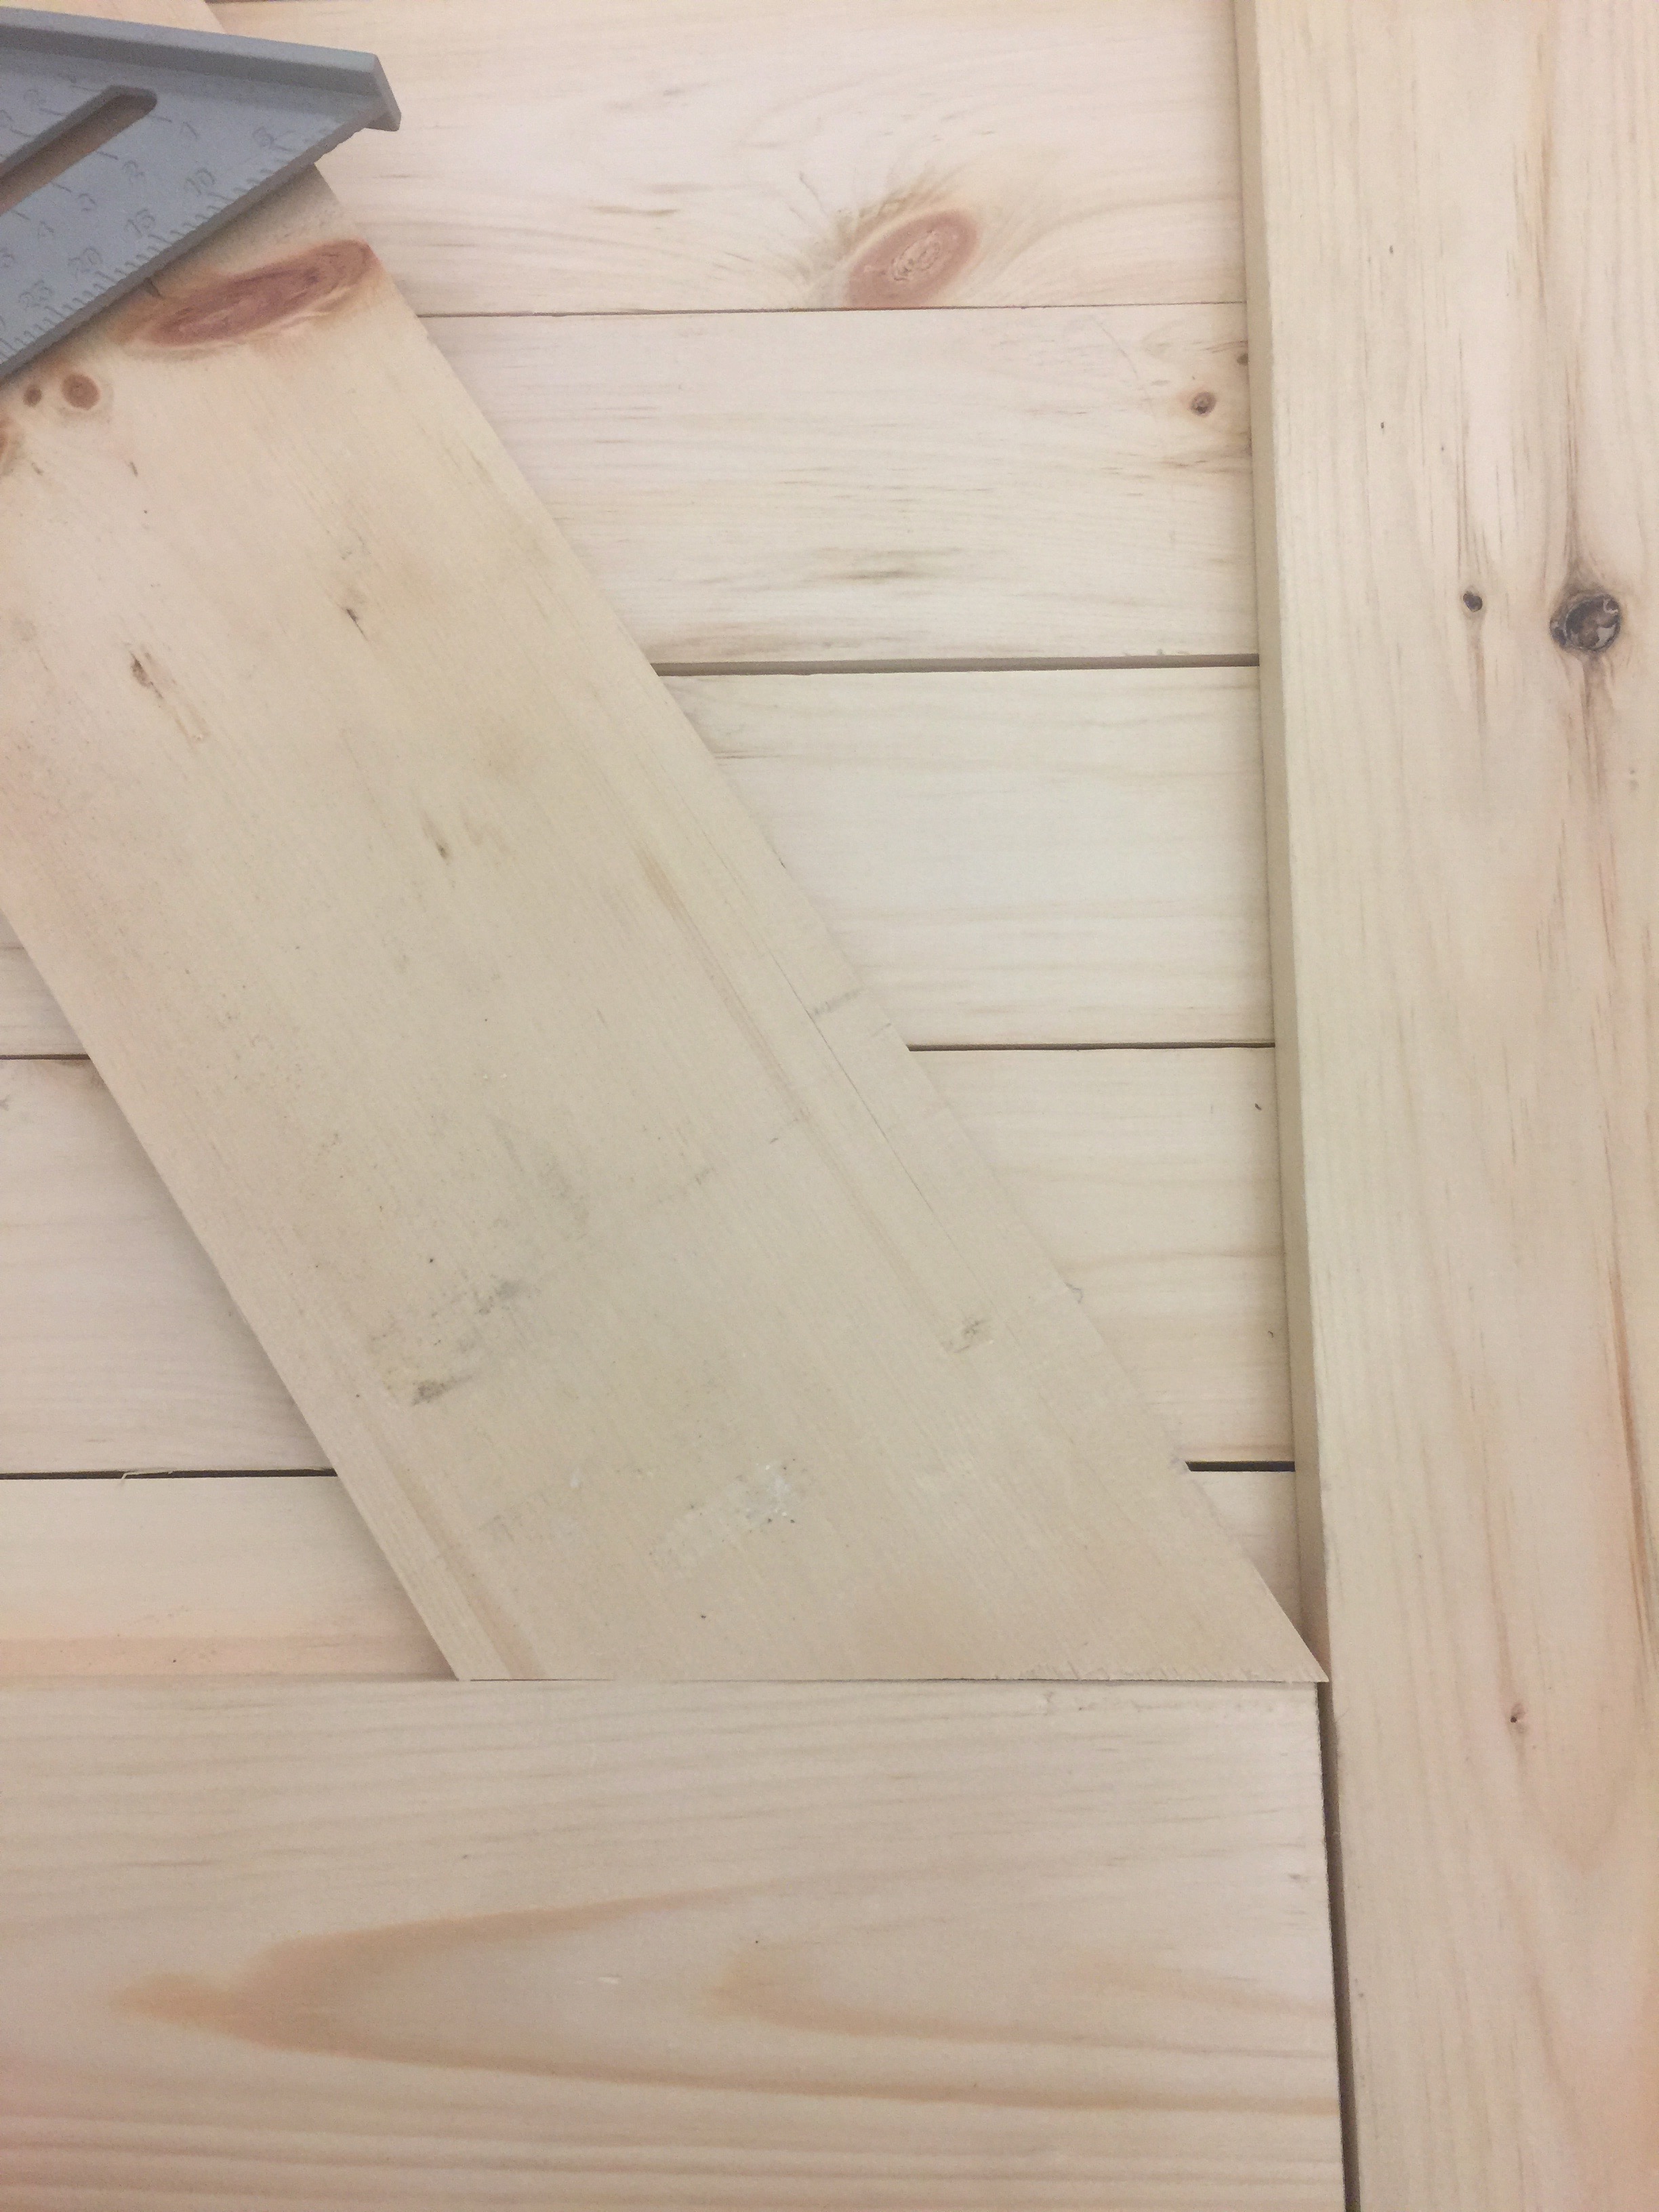
Since I didn’t want any overlay of my cross pieces, the other side of my “X” needed to be two pieces. Again, I used a speed square to determine the appropriate place to make my cuts. After I attached the two pieces, it was apparent that my X was uneven. I cut another piece. Still uneven. After the third try, I finally got it so it fit into the required space.
After drilling in the last component of my cross piece, it was pointed out to me that I had only made one cut into the bottom piece.
Oh well. I was running out of lumber and I was beyond frustrated with the piece. I decided to chalk up its asymmetry as a charming characteristic.
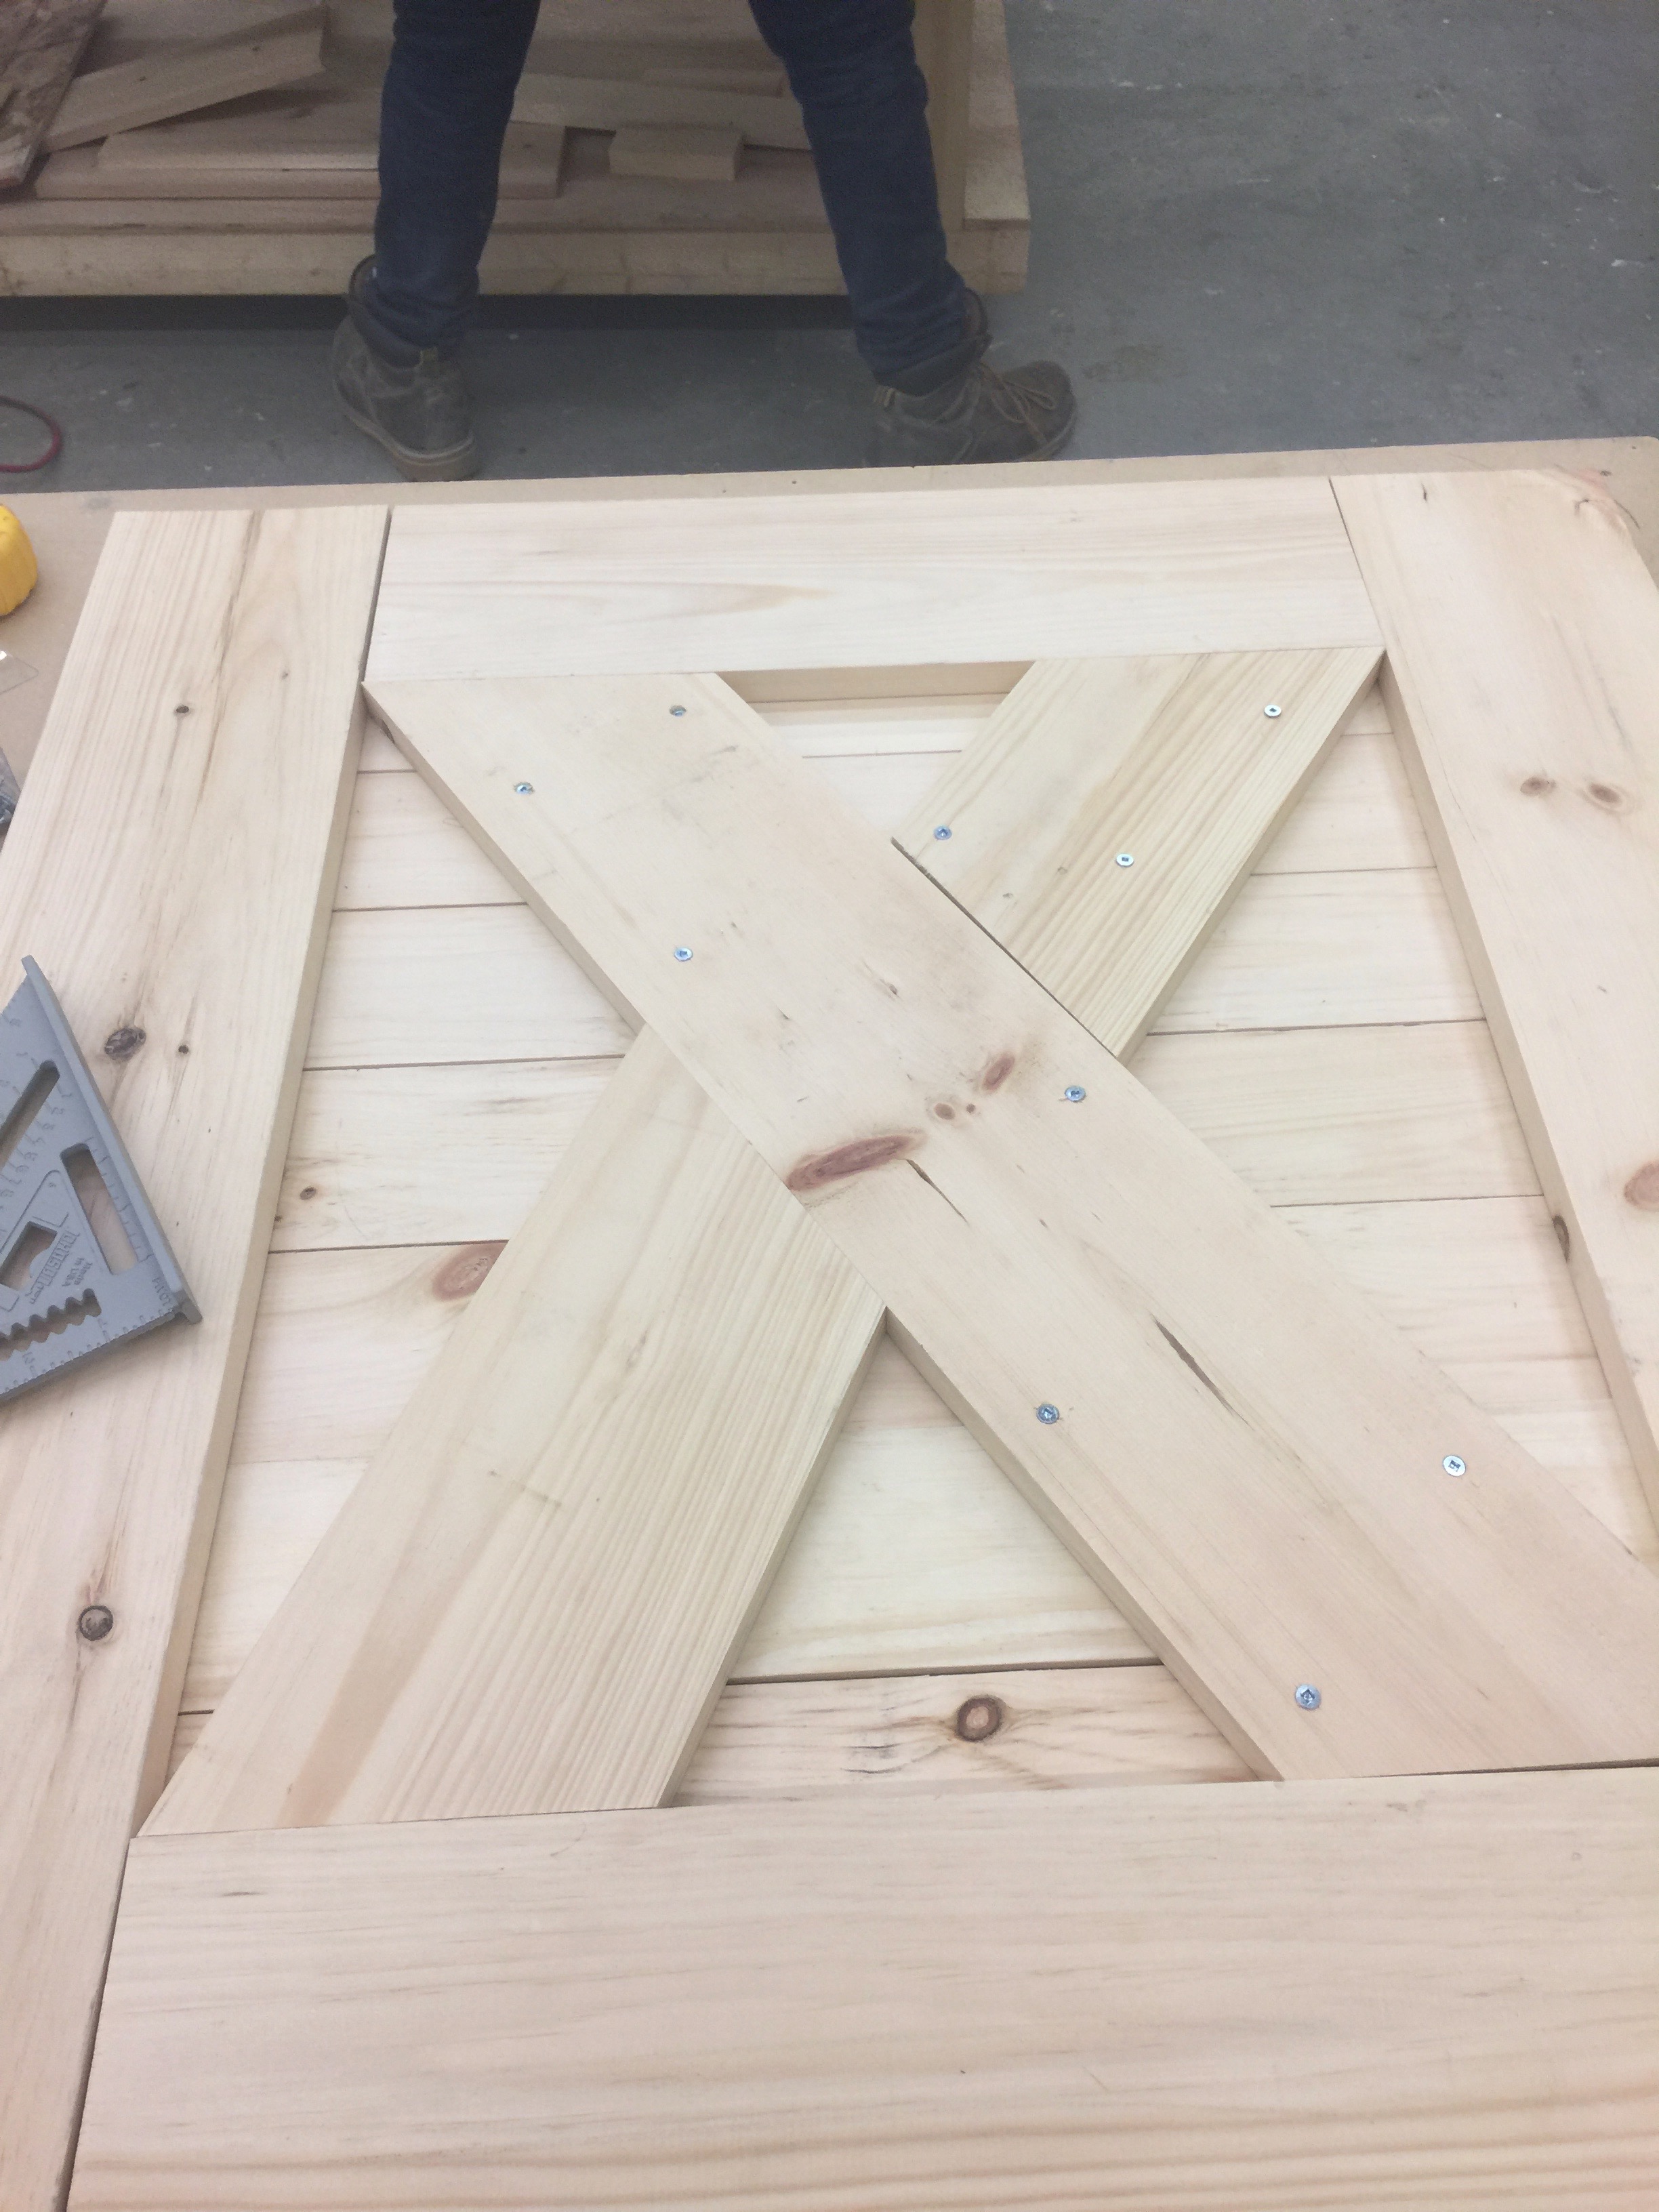
The next step on my list was attaching the rail piece at the top. Using scrap lumber as a buffer, I clamped down two perpendicular sides of the gate. Measuring the length and width of the gate, I cut a rail (again, using the chop saw) that was 1” wider to give the gate a bit of a lip.
As the rail was quite narrow, Adam advised me to drill pilot holes to help reduce the odds of my wood splitting. After the holes were pre-drilled, I attached the rail using 1 ½” screws.
This Gate is Cursed
I was pretty excited when I finally got the rail and the cross pieces attached. I needed to attach the hinges and latch and then I was done! Adam came over to inspect my work, and we determined that my project was (still!) not square.
We decided that we would leave it be for now, and pick it back up next week. The plan is to use a table saw to shave off the uneven part of my gate (for the second time). If that is successful, all that remains is attaching the hinges and latch.
Based on the number of times that I had to attach/reattach pieces and readjust the sides, I decided that this gate is cursed. Or perhaps building it was too ambitious for a first solo project?
Either way, I couldn’t help but leave the class a bit frustrated.
I know that Rome wasn’t built in a day. I also know that the people that I am comparing myself to, in terms of work quality, proficiency and speed, have been practicing this trade for significantly more time than I have. I know that as I practice, my skill and workmanship will improve. However, I am impatient and eager.
Despite this week’s setbacks, I am still optimistic that I can make this gate work. Here’s to hoping the next class yields more successful results.
Article by: Samantha Dyck, Operations Manager, Hard Hat Hunter
Canadore College announced a partnership with Hard Hat Hunter, a unique social media channel geared towards the trades and construction industries in November 2016.