Adventures in Woodworking - Part 6
Mar 10, 2017 | Samantha Dyck, Operations Manager, Hard Hat Hunter

Finishing Up
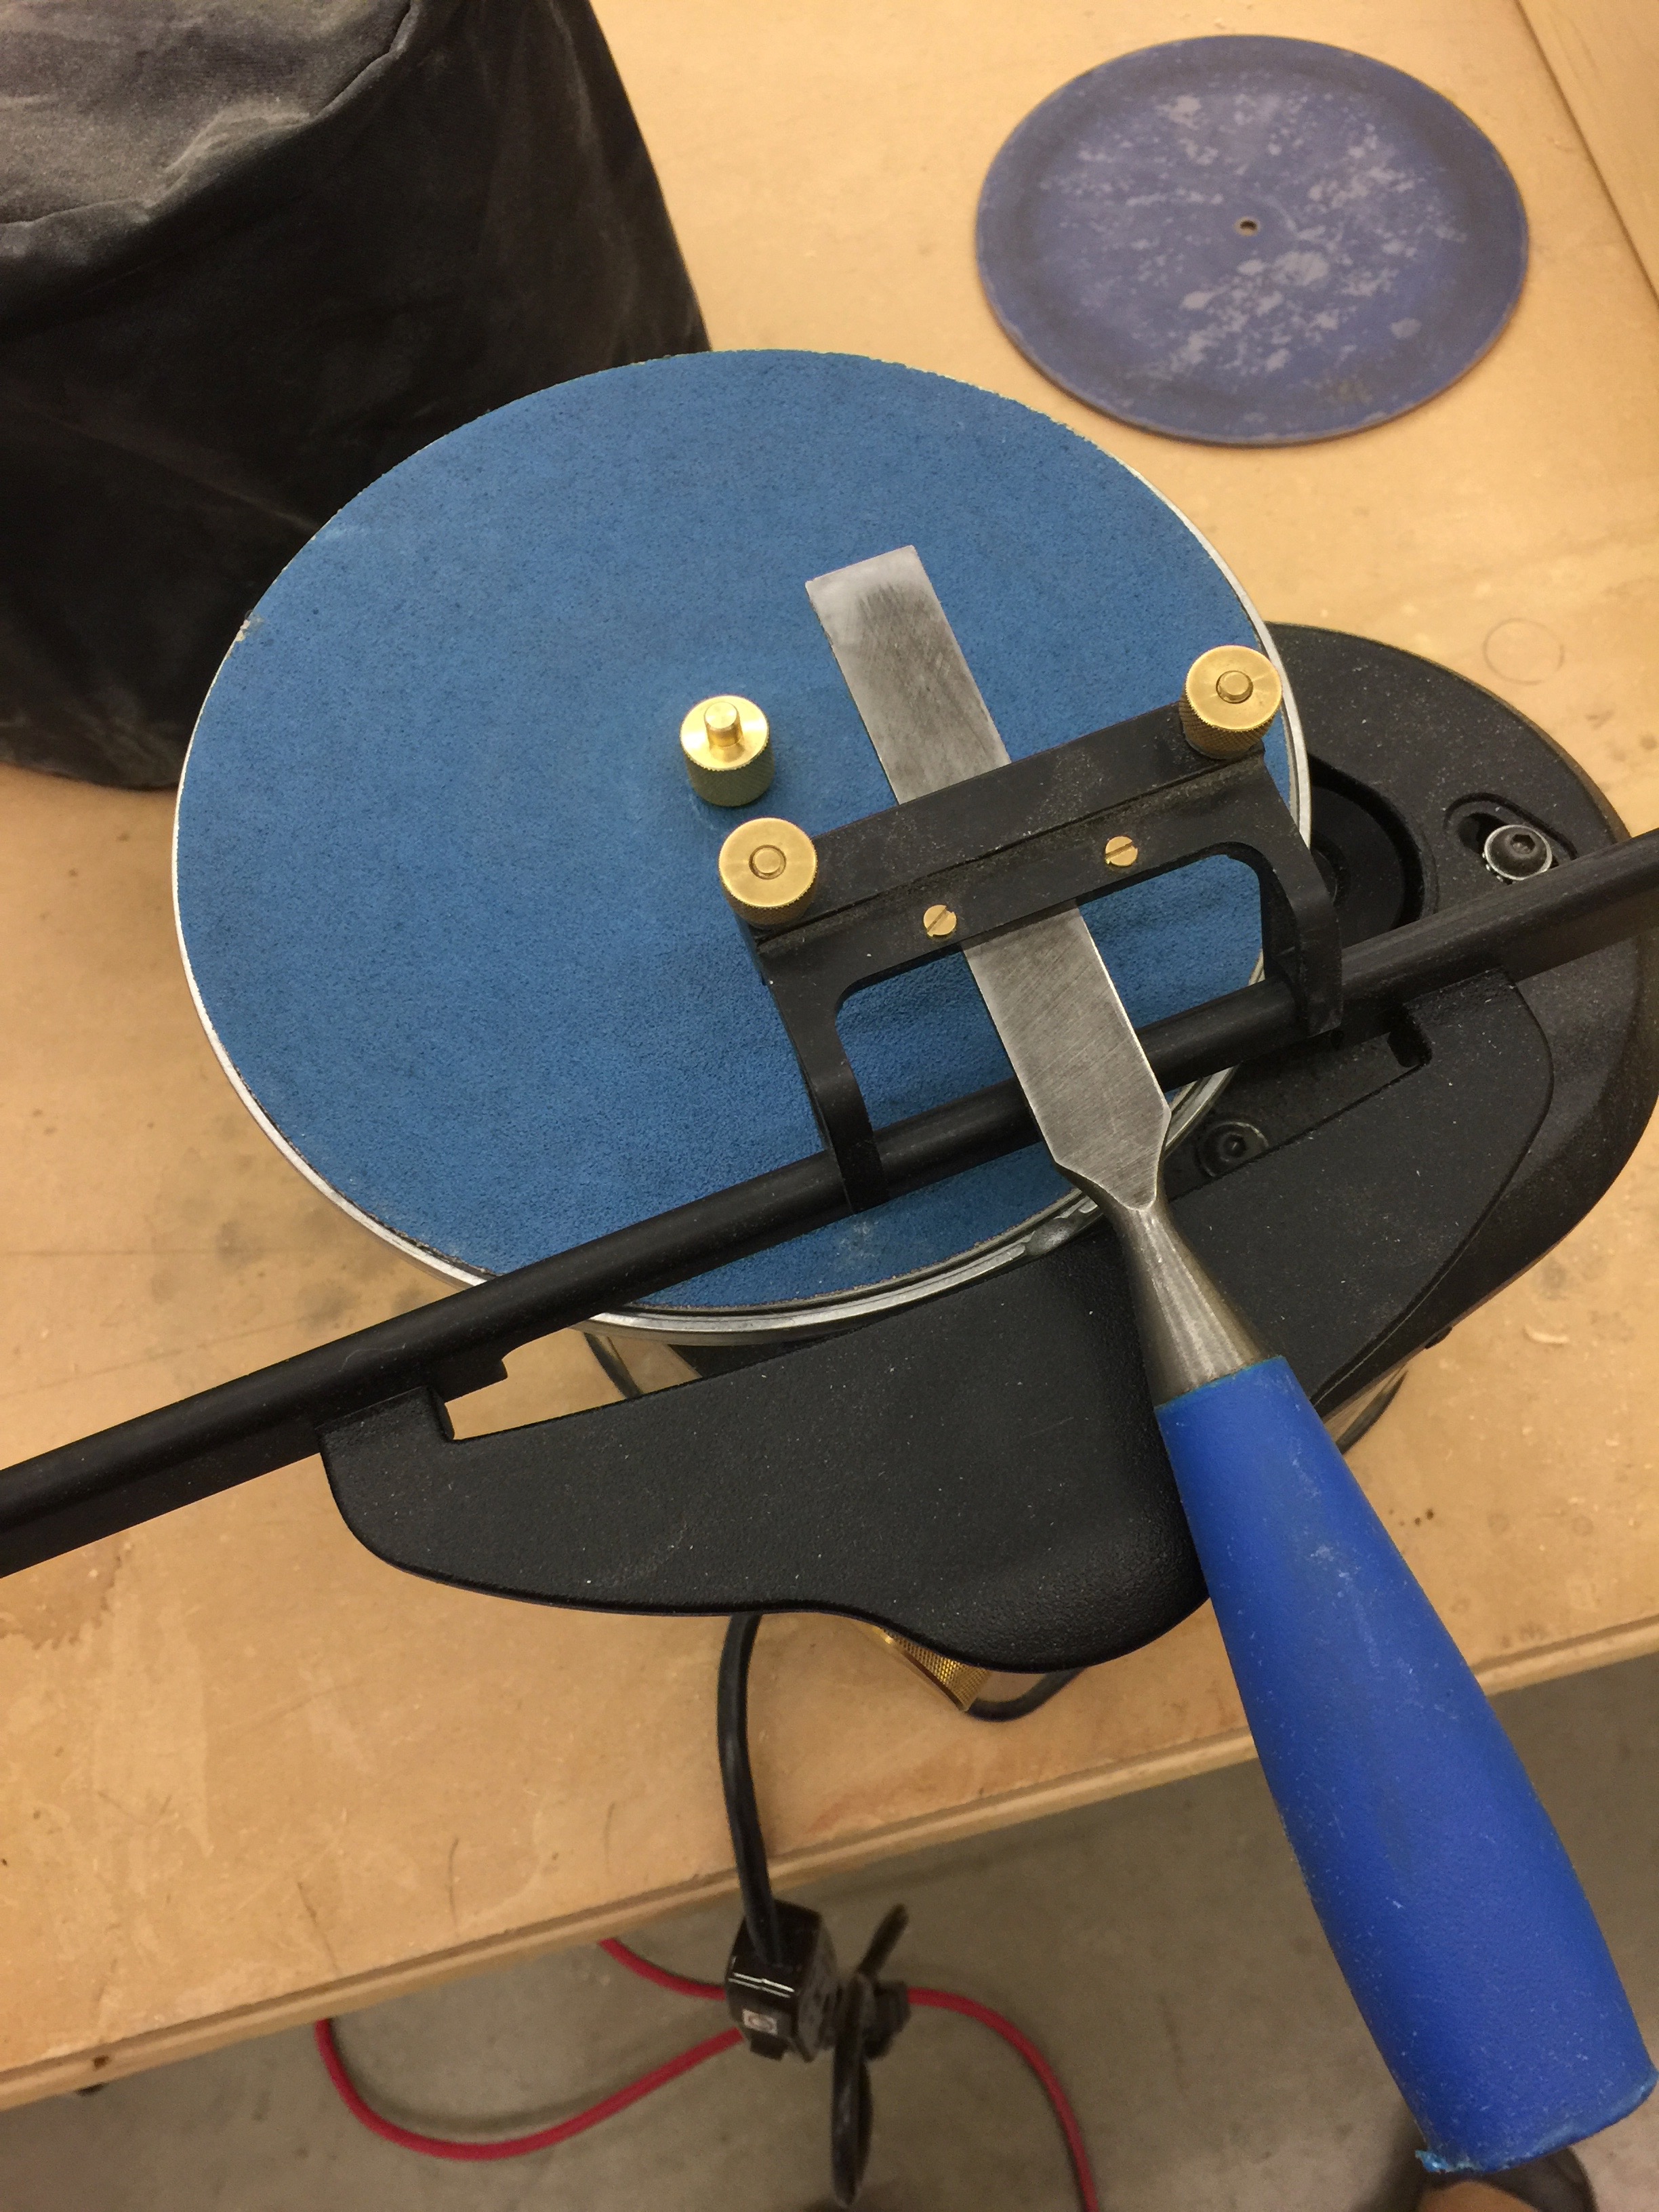
I went into class last week fiercely determined to finish my gate. Previously I had started to mortise out my hinge, so I needed to finish that up. I couldn’t find a ¾” chisel sharp enough, so it was time to put my sharpening skills into action. Using the power sharpening system, I quickly improved the primary bevel and microbevel, as well as lapped the face of the tool.
Once it was good to go, I got to mortising my second hinge.I wasn’t sure what I was doing wrong, but it seemed much more difficult to do than it had last week (more on that later).

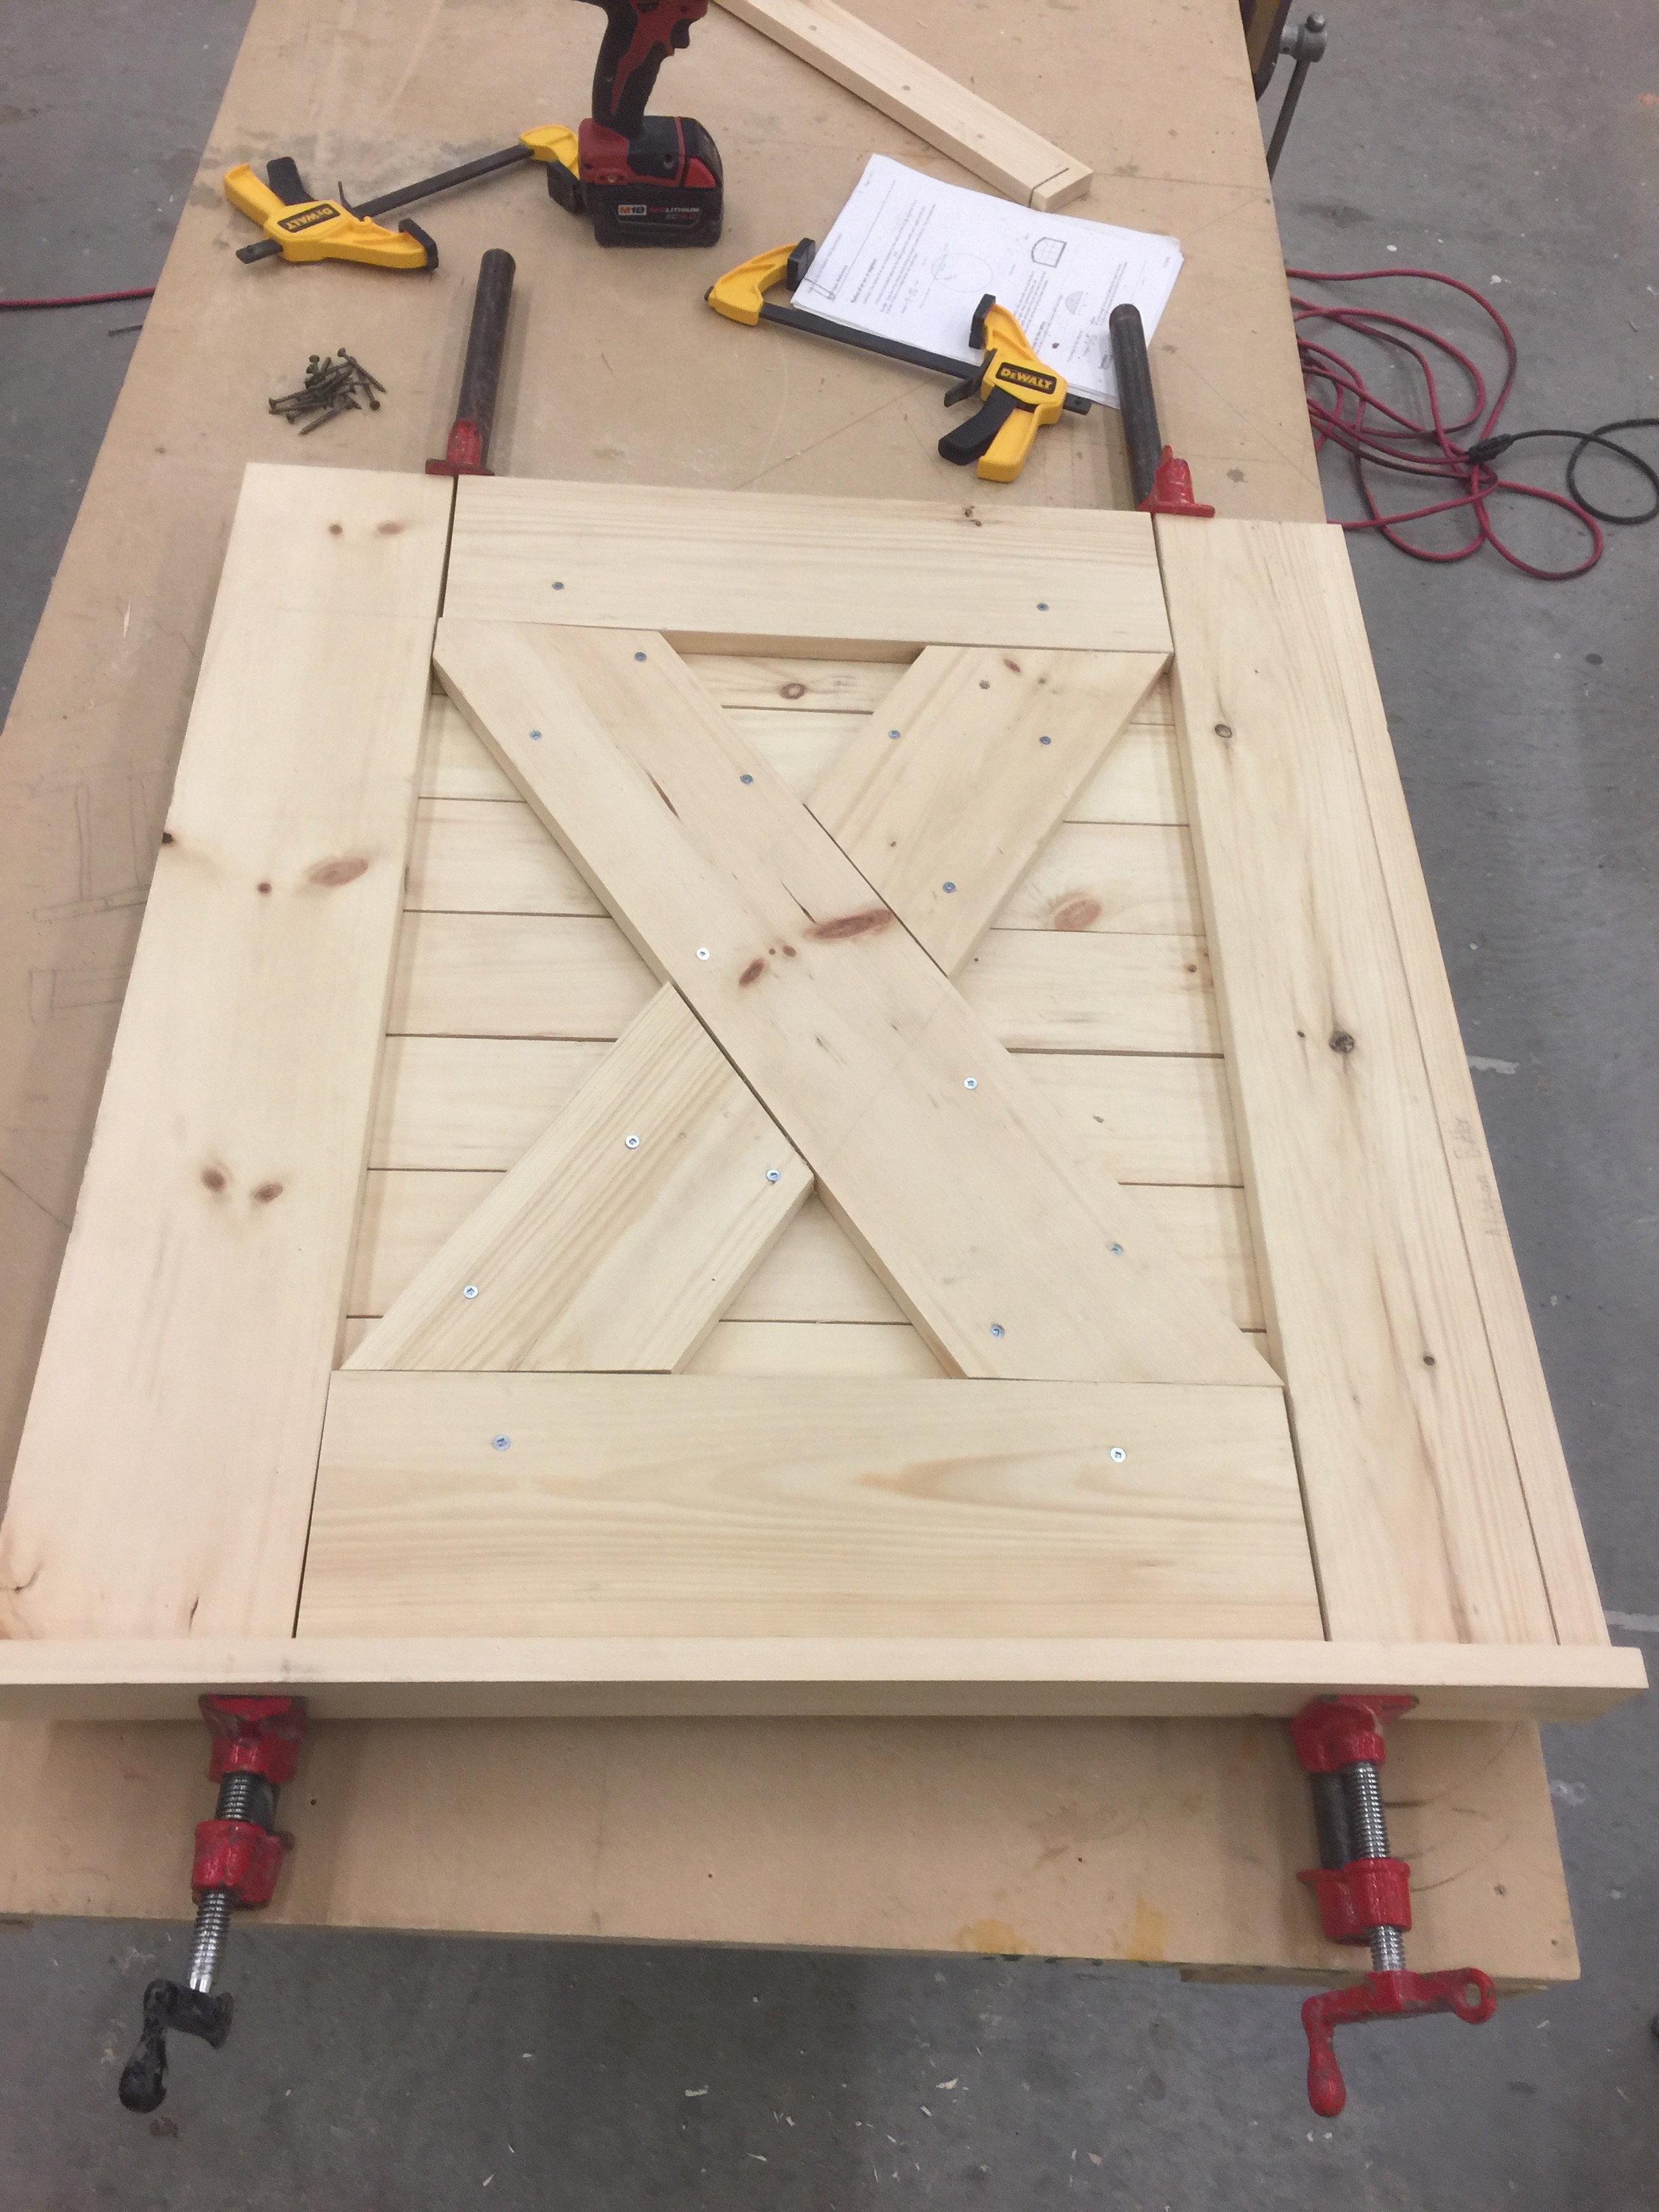
Next, I attached my 3” hinges with ¾” screws using a power drill in 2/3 of the hinge holes. I was excited when I did this with relative ease, as I had previously struggled to do so. After my hinges were attached, I noticed that one wasn’t sitting exactly flush with the rail. Because the piece of wood was quite narrow, Adam advised me to reattach it in the 3rd hinge hole, squaring it up, and to use the pre-drilled hole for a longer screw to attach the piece to my gate. Once my hinges were properly attached, I clamped down the gate and the rail, then used 2” screws to attach the pieces together, in addition to screwing in my 3rd hinge hole. Since my top rail piece had seen better days, I decided to re-make another piece. I grabbed my measuring tape and speed square to measure 30” in length, using the chop saw to make the cut. Next, I used the table saw to rip the piece down to 2 ½” in width.
Next, I cut a board that I will attach to my wall on which the gate will sit (Adam told me the name of this piece, but I can’t remember it for the life of me). I marked out where the hinges will sit, and got to mortising them out. Adam came by while I was struggling with using the chisel again, and pointed out that I was using the chisel upside down. Ugh. That’s why it was so hard to do! Once I started using the tool properly, it was much easier to do. Using ¾” screws again, I attached the hinge to my new piece. Then I put the hinge together, for a fully assembled gate!
As a finishing touch, I used a sanding block to quickly go over the whole gate and smooth over any rough edges. And then I was finished! I am so incredibly proud that I finished it, and did it all by myself! It’s so cool to be able to say that I built this!
Quick Project & Next Week

I thought that it would be a quick and easy project, so I started up. I cut 4 pieces to 25” in length using the chop saw. Next, to make sure they sat flush against each other, I used the jointer planer on both edges of each piece.Next week, I will use wood glue and clamps to attach the pieces. I’ll built a small support beam against the top and the bottom, and then be done!I also have to decide what my next project will be. Do you have any ideas? Maybe something a little less ambitious than a baby gate! Comment below and let me know what you think it should be!
Article by: Samantha Dyck, Operations Manager, Hard Hat Hunter Canadore College announced a partnership with Hard Hat Hunter, a unique social media channel geared towards the trades and construction industries in November 2016.